This year we went to the library every Friday for story hour. When the program ended, Miss G definitly needed a gift!

Grabbed a jar (Ikea) and some worms and some Cricut-ing later we had a gift for our favorite story hour leader!!


 To make the people, I picked up some game pawns from Windor Plywood. A lot of game pawns. My sister married into a huge family, and I wanted to make sure this gift could work for everyone. Unfortunately they were already painted, which made repainting them a bit more work since I had to do multiple coats.
 I started with painting all the heads flesh coloured. I then added the hair and features (half of the pawns are girls, and half boys, and I did half blonde and the others brown haired) The bodies were then painted red and blue. I drilled small holes in all the heads, and added small hooks (all facing left - I'll tell you why later ;)
  I added the hooks at this point to make it easier to coat them in polyurethane. Instead of painting them each individually, I dipped them in the can, then hung them to dry. Don't they look cute all hanging there? They ended up with a dried poly 'drip' on the bottom of each pawn, but since I'd be drilling another hole in the bottom anyways, I didn't worry about this so much.
  Once all the pawns were painted, hooked and polyed, I drilled another small hole in the bottom of each pawn and added a small eye, which was set perpendicular to the hook. And why did I do this? So that when the pawns were hanging they'd all face out! (see, I DO think ahead once and awhile!)
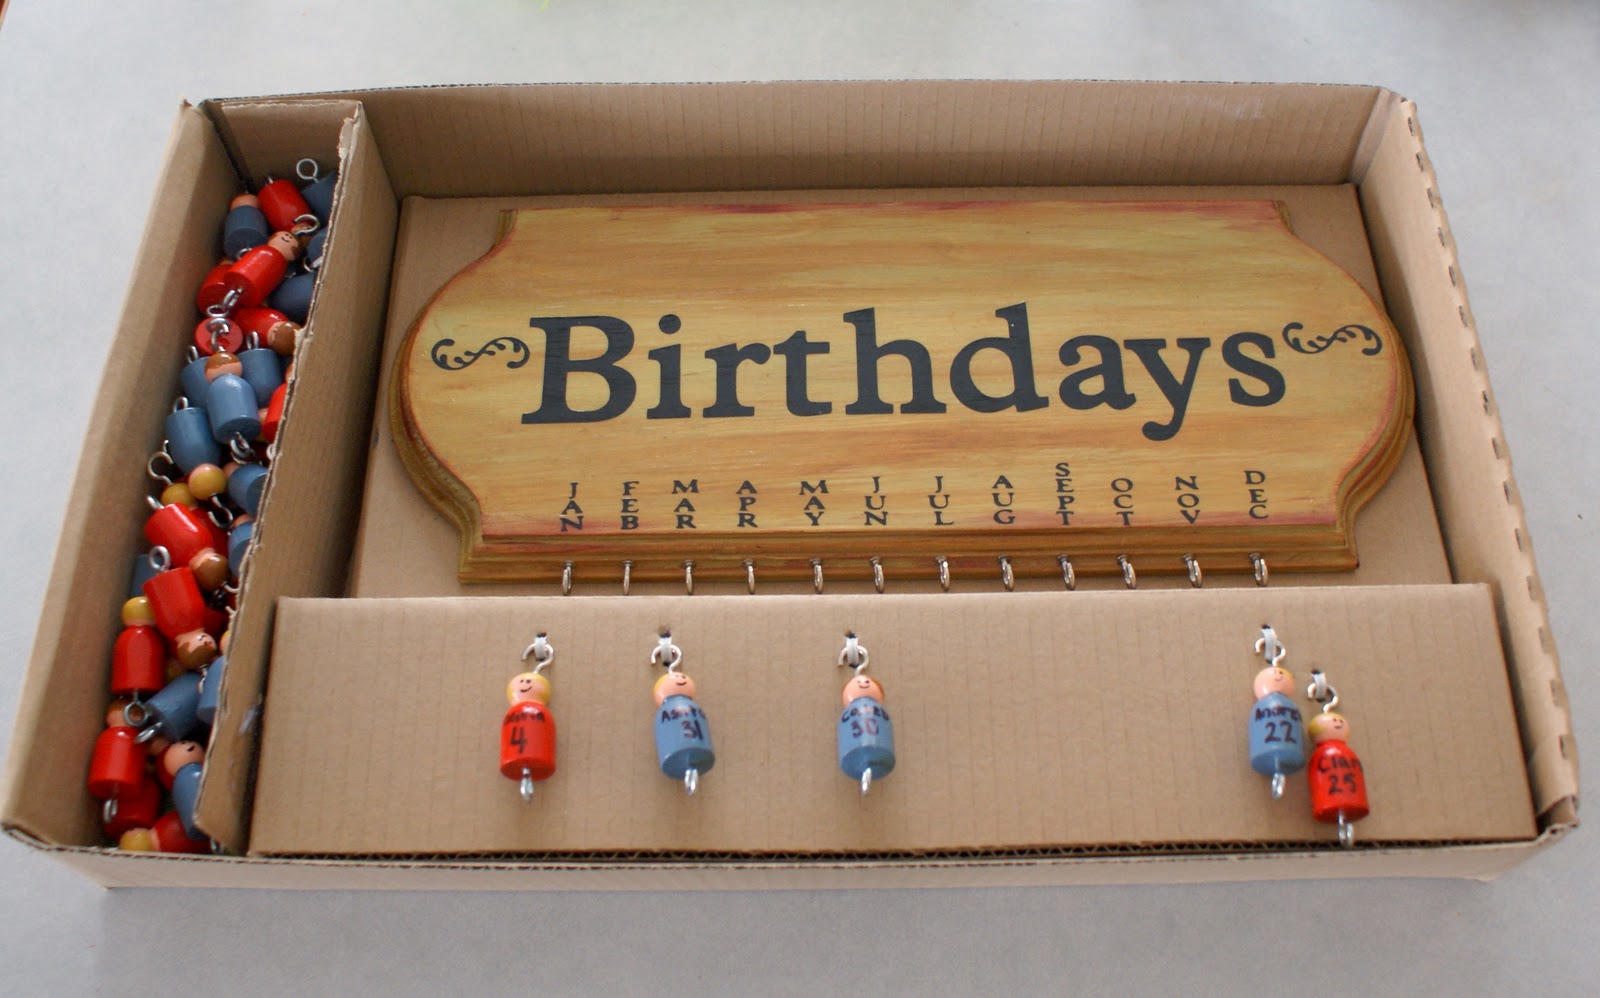
 And here's all sixty pawns all ready to be named:


 and I was amazed at how it motivated him to wash his hands after every bathroom use. He took it in the bathtub once, but for the rest just used it for hand washing. Well, the car is now excavated, so I thought I'd make him another one. And the rest of the nieces and nephews too. After all, how hard could it be?

