Showing posts with label DIY. Show all posts

Thursday, July 12, 2012

Gift jar

Should have posted this one in June when everyone needed teacher gifts! File this one away for next year I guess...

This year we went to the library every Friday for story hour. When the program ended, Miss G definitly needed a gift!


Grabbed a jar (Ikea) and some worms and some Cricut-ing later we had a gift for our favorite story hour leader!!

Monday, December 05, 2011

Handmade Birthday Calendar


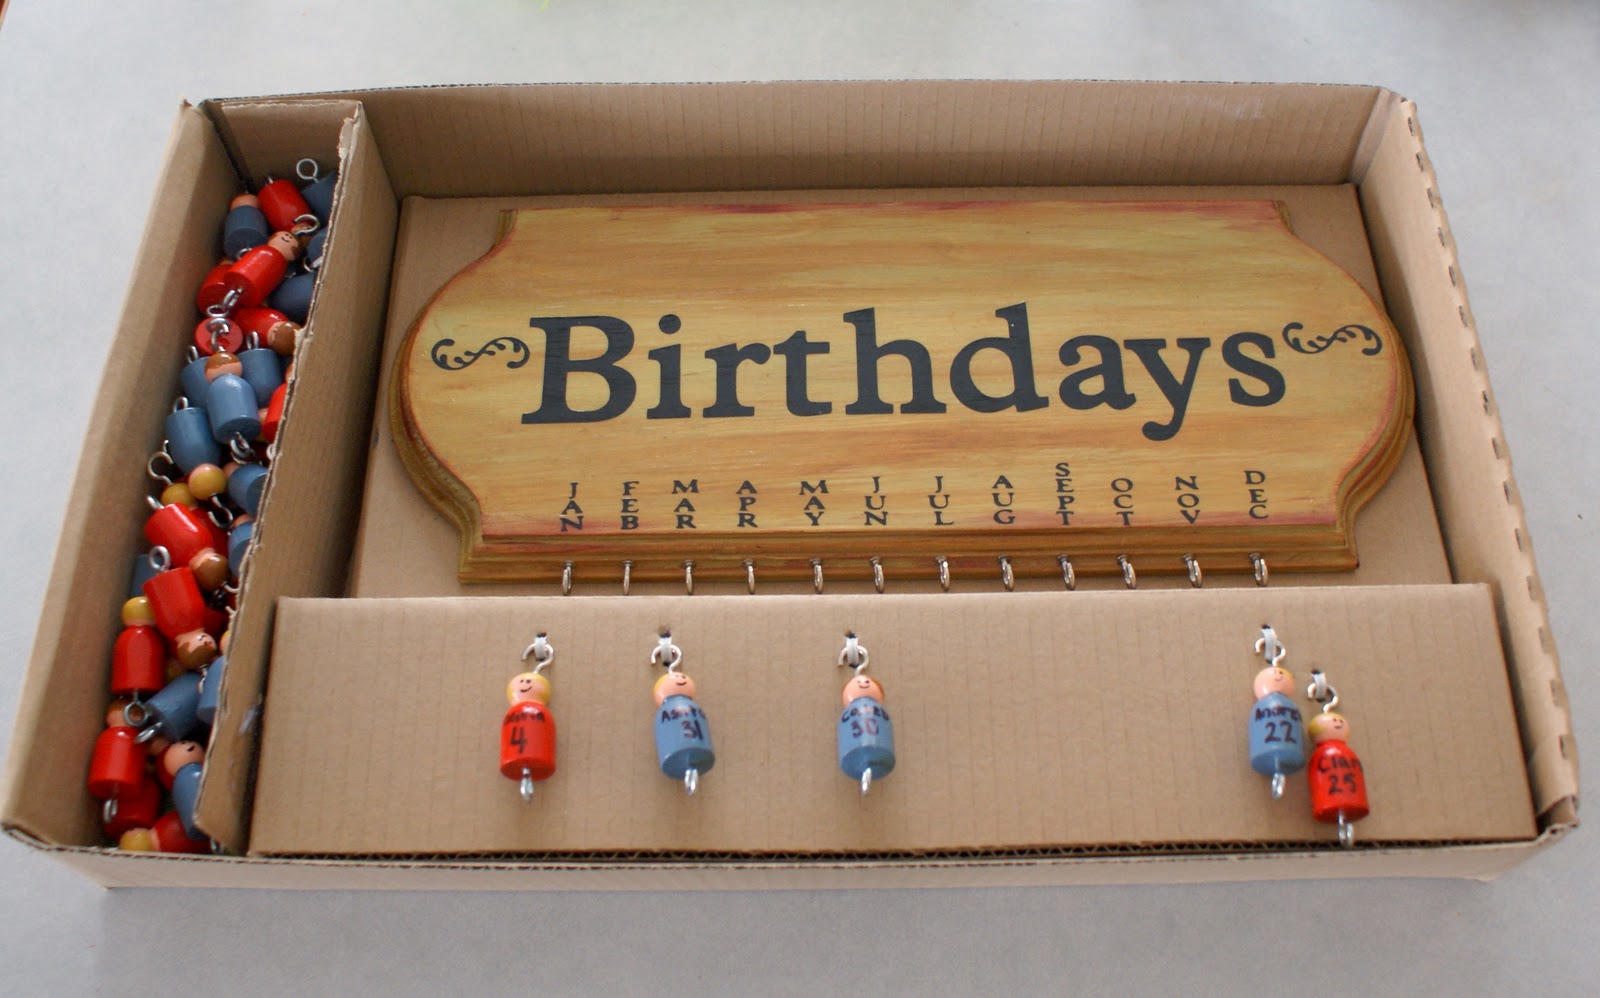
So this past weekend we had our gift exchange with my side of the family.  The adults did a Chinese gift exchange as usual, and the theme was handmade/secondhand/re gifted... and I had so much fun coming up with and making my handmade gift! I decided to make the perpetual birthday calender I saw on Pintrest (link here) Here's my completed project:


Obviously the person receiving the gift would want to choose whose birthday to remember, so I just made 'people' for the grandkids since they'd go on everyone's calendar anyways.

To make the people, I picked up some game pawns from Windor Plywood. A lot of game pawns. My sister married into a huge family, and I wanted to make sure this gift could work for everyone. Unfortunately they were already painted, which made repainting them a bit more work since I had to do multiple coats.
 I started with painting all the heads flesh coloured. I then added the hair and features (half of the pawns are girls, and half boys, and I did half blonde and the others brown haired) The bodies were then painted red and blue. I drilled small holes in all the heads, and added small hooks (all facing left - I'll tell you why later ;)
I added the hooks at this point to make it easier to coat them in polyurethane. Instead of painting them each individually, I dipped them in the can, then hung them to dry. Don't they look cute all hanging there? They ended up with a dried poly 'drip' on the bottom of each pawn, but since I'd be drilling another hole in the bottom anyways, I didn't worry about this so much.
Once all the pawns were painted, hooked and polyed, I drilled another small hole in the bottom of each pawn and added a small eye, which was set perpendicular to the hook.  And why did I do this? So that when the pawns were hanging they'd all face out! (see, I DO think ahead once and awhile!)
 And here's all sixty pawns all ready to be named:

I picked up a ready made plaque (yes, I cheated a little) and painted it in a kind of neutrally-wood-grain colour (so it would work with all decors) To make painting easier, I stuck four push-pins in the back side.
Using my brand-new Cricut (!!!) I cut out the text and the decals in black vinyl, applied them to the plaque, and polyurethaned it.


Some more drilling and adding of hooks and the whole thing is DONE! I'm thinking I have to make one for myself now :)


And because I'm such a dork, I also made a custom box for the whole shebang so it would look all pretty when unwrapped:


Is anyone wondering what the hubby made for this gift exchange? Sorry, I'm gonna show you anyways:
His minimalist, modern clock. TA DA!

Thursday, November 17, 2011

Peg dolls

After seeing Simple Simon & Co 's post showing off the peg dolls made for her son I fell in LOVE! Not that I particularly love Star Wars or Harry Potter, but I thought these little hand painted dolls were the cutest thing EVER!  And since my nephew is developing an obsession with Star Wars, I thought I'd throw some together to go with the Christmas gifts.  Some for the never-watched-the-movies Star Wars obsessed nephew, some for the almost-3-year-old niece, and some for Ashton, who caught me making them:


Aren't they fun? Here's the princesses: Ariel, Aurora, Belle, Snow White and Cinderella. Not sure how well she knows the characters, but she's already started a collection of Calico Critters (aka MapleTown - remember them?) so I didn't really want to do a dollhouse family.


Here's the Star Wars guys: Stormtrooper, Yoda, C3PO, R2D2, Darth Vadar, Luke, Han Solo and Princess Leia (I've never actually watched the movies start to finish, but I think these are the 'main' characters, right?)


And Ashton's: a knight, cowboy, superhero, pirate, Robin Hood and construction worker.  I did these while he was in bed, and wrapped them pretty cleverly I think, but he's still saying 'Oh! These are my superhero guys!'  The kid knows exactly what he's getting for Christmas.  Not sure if that's good or bad...


All of them are painted with acrylic paint (not the faces) and coated with polyurethane for durability. Aren't they CUUUUTE?!?!

Glycerin toy soap

Yet another Christmas idea! This summer at the St. Albert market, I came across a vendor selling various bath products including clear glycerin soap with toys inside.  Ashton picked out a car:

and I was amazed at how it motivated him to wash his hands after every bathroom use.  He took it in the bathtub once, but for the rest just used it for hand washing.  Well, the car is now excavated, so I thought I'd make him another one.  And the rest of the nieces and nephews too.  After all, how hard could it be?

Turns out, it could be pretty hard if one doesn't know what they are doing.

I picked up some soap with glycerin as one of the ingredients, thinking that 'this'll be a cinch! just melt it down, pour it in a container and there you go!' I had read somewhere that you can melt down soap in the microwave.  One bar got burnt that way.  Burnt soap, who knew? Alright then, no microwave.  I'll just grate it down and melt it on the stove like I do when making laundry detergent.  Not as much water though, we want it to still be solid. Nope. After gingerly adding more and more water, I wasn't getting any melting, just lumpy chunks (or is it chunky lumps?).

Hmm...this is going to take some googling.  So after coming to grip with the fact that this might take a bit more effort than first thought, I began my search.  Found a couple great websites on soap making, learnt some soap making terms, and I was back on track. (The websites I found most helpful for this project are here and here.)

Okay, since I live in hicksville central, there's no way I could get my hands on some 'melt and pour' soap supplies, and I wanted to get this done since we were going to visit some of the clan the next week, I visited the local Rexall and picked up some REAL glycerin soap.  The stuff that actually looks clear and can easily be scored with a fingernail.  Then a stop to the liquor store for some vodka (to use instead of water - although it could be used to ease frustrations too ;) I'm thankful that I had read something about melting down in a crockpot instead of on the gas stove, because it probably wouldn't even have crossed my mind that the alcohol fumes would ignite. I cut the soap into cubes, added a bit of vodka, and set the crockpot on low, stirring occasionally.  When I saw how easily this soap melted, I realized I probably could have gotten away without the vodka, but no chances were taken this time around!

Here's a pic of the supplies beforehand, minus the soap:


Lego men for the boys, little ponies for the girls and cheap dollar store containers for the moulds.

I poured a small amount of soap into the moulds and let it harden before adding the toys so they wouldn't sink to the bottom. When that had solidified I placed the toys, and poured the soap to cover them.  A couple hours later I could push the bottom of the containers and the soap just slid out!

TA DA!


Some of them are a little bubbly since I was almost running out of soap so I had to remelt the trimmed edges a few times.  Here's a side view, I don't like the definite line from the first pour, but what do you do?


I hope all the kids enjoy them! The kids that we visited last weekend seemed to, although the boys are a little older, so didn't have the patience to wait for their Lego men.  They decided to take a bath and dig them out instead! (And to tell you the truth, I kinda expected that :)

Friday, October 21, 2011

Upcycled Sweater Dress

Really easy project which costs practically nothing! I visited the thrift store and picked up this ladies turtle neck:

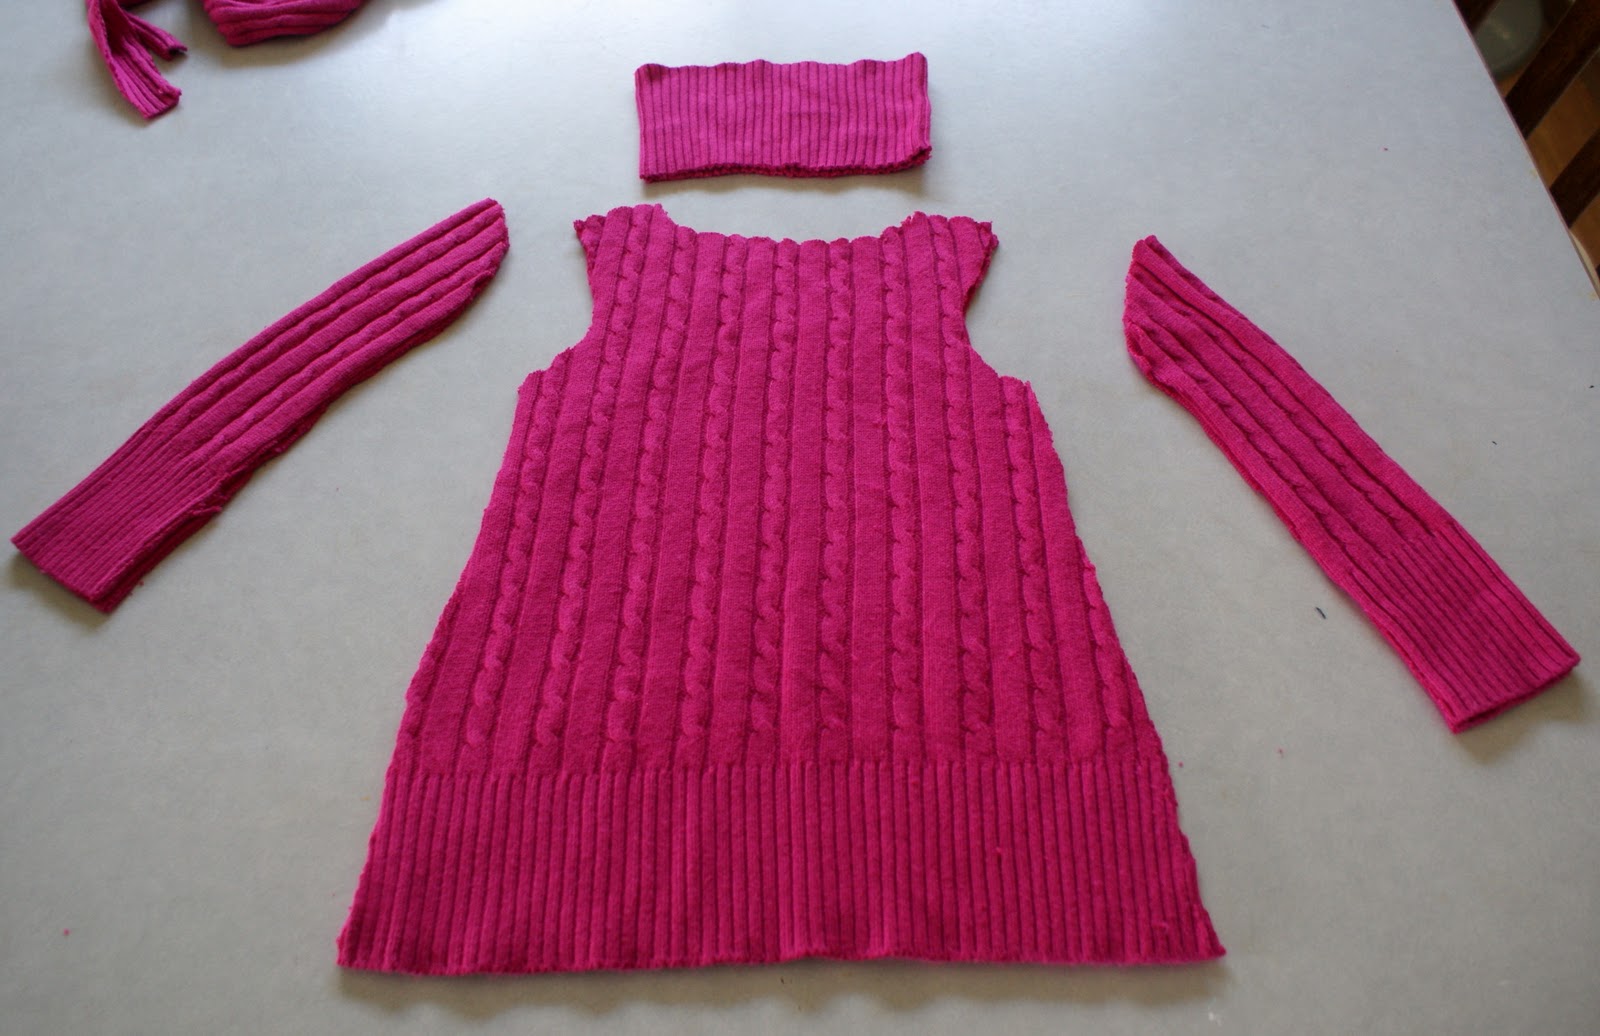
Using a dress from Olivia's wardrobe as a template, I cut out the front, back, sleeves and neck.  I didn't add seam allowances since this knit is reeeeally stretchy:


With the wrong sides together, I sewed the shoulder seams:


Then pinned and sewed the neck:


Then pinned and sewed  the sleeves onto the dress:


Then sewed the sleeve seam down the underarm to the sides of the dress:


And TA DA! That's all there is to it!  I even picked up another thrifted sweater which is waiting in my huge project pile...such a comfy, pretty fall outfit!  Here's the little princess 'modeling' it.  Although it would be nice to get a better shot of the dress, I'm in no hurry for her to start running around!


Thursday, August 11, 2011

How to resize a tshirt (and my first go at freezer paper stencilling!)

K, so altering a tshirt may not be rocket science, but you never know.  I've had this idea for freezer paper stencilling for awhile, but since I don't have the shopping opportunities I used to it's kinda been on hold until I could pick up two red tshirts.  Plain red.  With nothing on them.  Like, no logos or anything.  Yup.  Harder than you thought isn't it?  Okay, it wasn't all that hard.  Zellers had them.  And on sale too!  At least they had Ashton's size (I got him a 6)  But try to find a plain red t or onesie in a 6m size, especially in August!  But I found a long-sleeved t which could be re sized for O (on sale too!) in a size 2.

So obviously the first thing to do is cut up the shirt.  Trace a tshirt that fits along the arm and side seam, remembering to add seam allowance (!)  If the neck of the new shirt isn't too much bigger, leave as is. (in my case it was fine.  If you do have to alter it...um...google it?) Cut along lines.  Trace the sleeves of the old shirt along the arm seam onto the sleeves of the new shirt.  In this case the hem of the sleeves were about the same size, so I definitely took advantage of that.

So you should end up with something like this:


I used a serger for this project (hence the white thread.  Too lazy to change it) but you could easily use a regular machine and zig zag the edges afterwards.  Open up your shirt, and sew the arm seams, but not the seam under the arm for now.  You might have to tweak the curve of the arm a bit, but this is knit, and knit is forgiving.  A little stretch, a little push, and a final steam with the iron and no one is the wiser, right?  Okay, yes.  I admit it.  I cheat a lot with sewing, but is anyone actually going to stop your kids and examine their clothes reeeally closely?  I should hope not.  Moving on.  Where were we?  I think here:
Now sew the underarm seam continuing to the side seam.  Ta Da.  For those of you still trying to 'set' your sleeves after sewing the side seams, STOP.  I serged the bottom of the shirt as well so I wouldn't have to roll the hem 'cause I'm lazy like that.

A quick switch to the regular machine for the hem (yes, I switched the thread) and DONE.

Okay, not quite done.  I still had to press it. (when ironing knits don't drag the iron across, just hold in place and steam. Not for too long obviously.  When you start seeing smoke, that's a sign you've pressed a little too long...) But I had good reason not to press this right away, since I was using this shirt for my first (bum ba da bum!)
FREEZER PAPER STENCIL
Yay! Lots of tutorials for that floating around blog land for these, so I won't give you a step by step for that, but I will show you the finished product.  Ahem, drum roll:

(see how pretty the hem is now?) I'm so proud of myself for pulling this off with the first try!  And Ashton looves them! (Olivia just wanted to eat it, go figure)  They weren't really in a posing mood, but I did get this shot of them:


Anyways, hope this was marginally helpful to somebody...

my crafty side is already filling up with more freezer paper stencil ideas...it's so easy and fun!

Friday, August 05, 2011

DIY decor using shims.

So my basement is slooooowly getting done.  DH is having problems convincing buddies to come and help install the floor - it's 2/3 of the way there.  As soon as that's done, we can start setting up since there's just trim and doors and bathroom stuff and closet stuff...okay there's a lot of stuff left after the floor, but you get the point.  I've seen some pretty cool stuff here in 'net land to decorate the basement with.  My Pintrest basement board is chock full of all sorts of DIY goodies.  Here's one I absolutely swooned over!

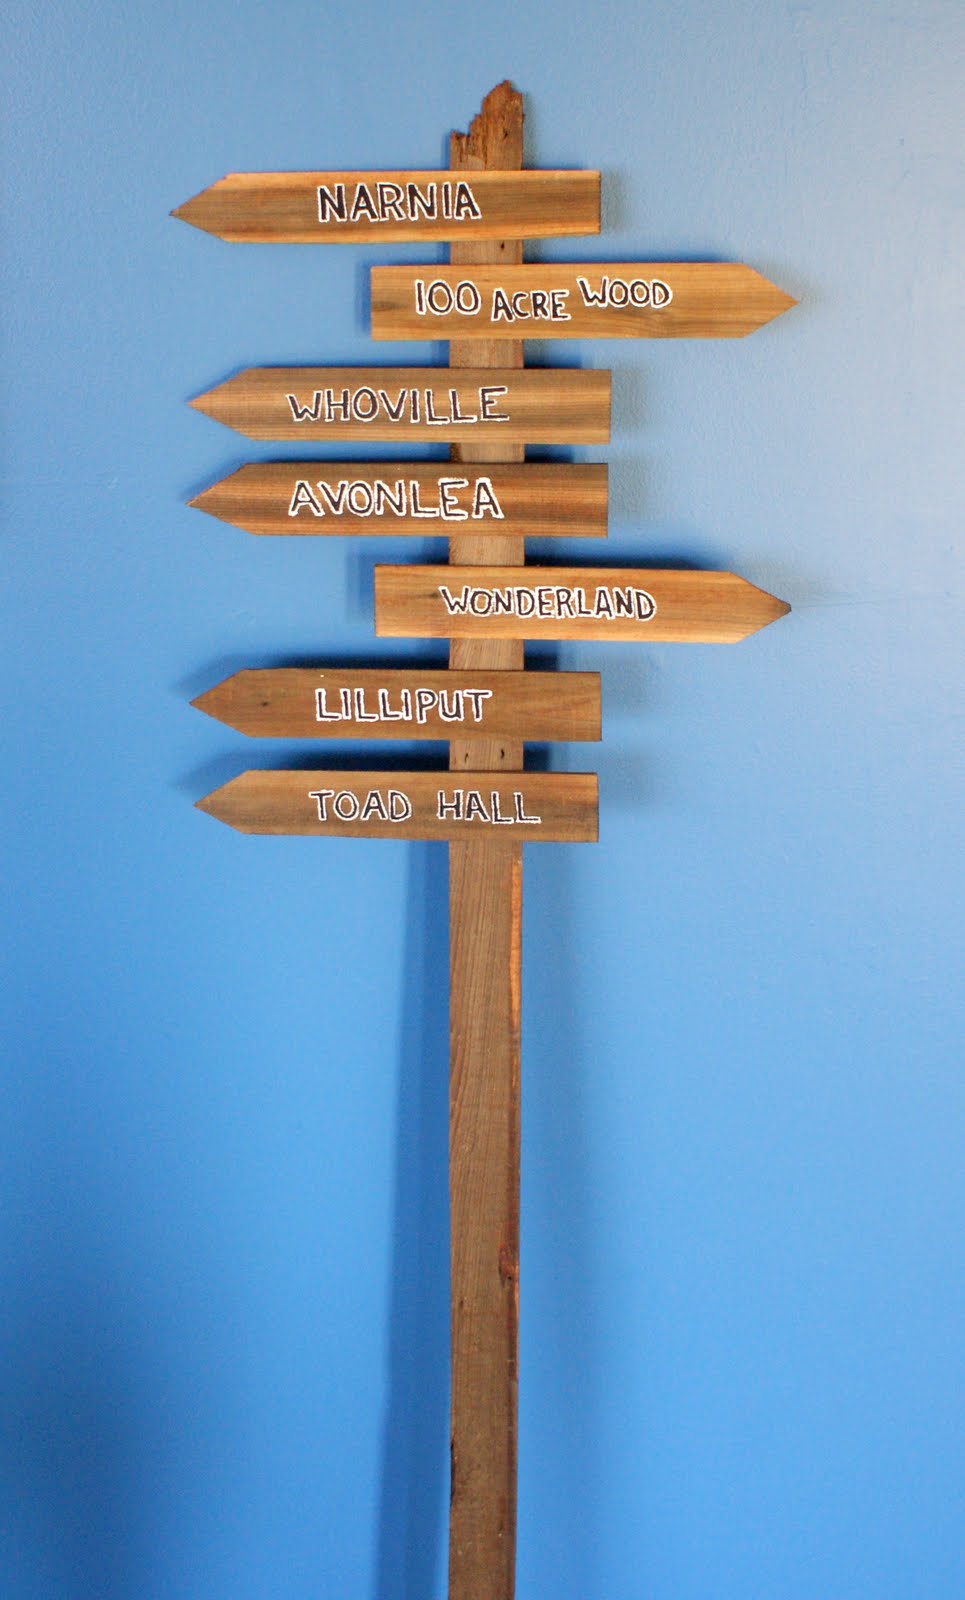
Perfect by a little reading corner!  So my little brain got to work: How can I make this without 1. going to buy lumber and transporting it home on top of the car seats and 2. Cut the lumber without wading over top of DH's mess in the garage.  The answer came as I was organizing the complete disaster downstairs: SHIMS!  (y'know, those little wedges used to make the jam level when installing a door - I think they're usually made of ceder)  There were two lovely packs sitting there waiting and waiting to be used, so I thought, why make them wait any longer?  So I went and grabbed the prettiest ones (some are a little cracked or knotty)  As stated before, although I can use power tools, I didn't feel like wading through the mess, so to create the points for the arrows I used a utility knife.  Just made a few cuts and voila beautifully pointy shims!  To 'antiquify' the wood I let some steel wool sit in white vinegar for a few hours, then brushed the mixture on the wood.  (wherever the bits of steel wool hit the wood, there ended up being little rusty speckles.  And I also antiqued my ugly laminate counter top in the process - reason #52 for a new kitchen...)


I had envisioned doing each sign in some lovely font which went with the story, but that never occurred.  Just painted some block letters on with black acrylic and outlined with white.


I chose locations in stories which I had read as a child (okay, who am I kidding, that I still read now) Mounted on a scrap piece of wood (also 'antiqued') with wood glue, I think it looks pretty good!

I also saw this sign from artsy fartsy mama that I thought would 'match' pretty well

So here's my version:

Shims lined up, one glued across the back holding it all together.  I decided not to 'antique' this one.  And how did I get the font?  Well I'm glad you asked!  After brainstorming quite a bit I thought of this really easy way to transfer images to a non-smooth surface.  All I did was print the text (backwards!) on a transparency.  With an ink jet printer the ink does not dry (make sure you're not using an 'inkjet transparency')  Flip the transparency ink side down, place on wood (no wiggling, you'll smudge it) and rub.  The ink should transfer so that you can go  over it with the paint colour of your choice!  Done and done.

My hubby's comment when he saw my 'creations' "How do you expect me to hang the doors if you keep using all the shims?"  Ha ha.


UPDATE: YES, I MISSPELLED ROALD DAHL'S NAME. IT'S FIXED NOW...OOPS!