Showing posts with label baby. Show all posts

Saturday, January 28, 2012

Tutu dress

Recently I was lucky enough to test the Madeline Tutu Jumper from Amy's AMAZING PeekaBoo Pattern Shop. 


What I love most about this pattern is it's versatility.  Different fabric and colour choices will give you a completely different feel to this little number.  I went with a funky cotton print, but can you imagine this in a deep, jewel-toned velvet? Or white eyelet with lace instead of the tulle? The possibilities are endless!!  The pattern called for a knotted strap, but since Olivia is still crawling, I decided to loop the straps and use a button.


Loving the fluffy little baby butt!


Friday, October 21, 2011

Upcycled Sweater Dress

Really easy project which costs practically nothing! I visited the thrift store and picked up this ladies turtle neck:

Using a dress from Olivia's wardrobe as a template, I cut out the front, back, sleeves and neck.  I didn't add seam allowances since this knit is reeeeally stretchy:


With the wrong sides together, I sewed the shoulder seams:


Then pinned and sewed the neck:


Then pinned and sewed  the sleeves onto the dress:


Then sewed the sleeve seam down the underarm to the sides of the dress:


And TA DA! That's all there is to it!  I even picked up another thrifted sweater which is waiting in my huge project pile...such a comfy, pretty fall outfit!  Here's the little princess 'modeling' it.  Although it would be nice to get a better shot of the dress, I'm in no hurry for her to start running around!


Tuesday, August 16, 2011

Easy shirred bandana dress tutorial

A few posts ago I posted a bandana dress that I had made for Olivia here.  It turned out really cute and since it's so easy to make I thought I'd put together a tutorial for it.  This one will actually be a toddler top, but the only difference in the construction is how tight the shirring is.  Here we go!
First of all hit the dollar store and pick up two bandanas.  These were $1 each and are 100% cotton, so I prewashed them so they won't shrink afterwards.  I prewashed the previous ones as well, but on subsequent washings the colour bled a bit, so be warned!
Next, we're going to shir each bandana.  There's lot's of shirring tutorials out there, but here's what I do. 
Wind the bottom bobbin with elastic thread.  Don't stretch the thread tight as you wind it, but don't wind it loosely either.  Then place it in your bobbin holder.  I've used both a side and drop-in machine and they both seem to work fine.
Sew a few rows along the edge of the bandanas.  It can be kind of tricky to get the rows perfectly straight, so go ahead and mark it (I'm too cheap to buy a water soluable marking pen, so I just grab a piece of chalk off Ashton's easel!)  Less rows will make more of an empire waist line.  I decided on 5 for this one.  Don't worry about how gathered your lines are at this point. (left picture)
To gather your sirring simply pull the bottom bobin thread (the elastic) to your desired width.  Repeat with all the rows, making sure both front and back are roughly the same width (right picture)

So that the elastic ends don't slip after trimming and so that they don't stick out and tickle, I sew the front and back together using a french seam.  With a french seam you sew the sides firstly with the WRONG sides together, then turn and sew again with the RIGHT sides together.  Obviously your second seam will be a little wider so you don't see the ends of your first seam poking out.


To make the halter tie sew two ribbons together at a right angle (left picture)  Or if you don't have any ribbon that matches your dress, grab some scrap fabric (or bias tape, or whatever works) and sew a small tube to flip right side out.  Then sew the right angle of your ribbon to the front of your dress.

And VOILA you're done!  Pretty easy, hey?


Feel free to ask me any questions you may have and I'll do my best to answer them!  Have fun!


Featured on Tip Junkie

Thursday, July 21, 2011

Sewing for my little girl

When Olivia was born my sister loaned me some baby clothes which included LOTS of summer dresses.  But having my first girl and being somewhat crafty, I can't stop myself from pumping out a few dresses now and then.  First of all, I've been seeing these bandanna dresses around: http://artsyfartsymama.blogspot.com/2011/07/bandana-dress.html AND http://www.momtastic.com/home-and-living/features/128314-diy-st-pattys-bandana-dress and am loving them.  First of all, they're inexpensive.  A trip to the dollar store for two $1 bandannas.  Secondly, they're nice and lightweight for those few blistering days we sometimes get (have you heard we're supposed to have a really warm August)  Really easy project: shirring, seams and ribbon.


Since madam is so scrawny I trimmed the outer edges (and used them to make the ties) so there was some hemming involved, but I think any bigger that 6 months you could get away with just sewing the two sides together, shirring (or adding a casing for some elastic) and attaching some ribbon ties!  This could even be made as a toddler shirt.
I decided to make it a halter, so I attached the ties at the middle and made sure I had enough length to tie a bow.  Here's madam pretending she doesn't know what to do in front of the camera:


Sorry, I had my 50mm lens so only her eyes are really in focus, but you can see how I just sewed the ties together at a right angle, then attached them to the front (after shirring).
And here's a view of the back.  Now that O is swimming around, it's rather challenging getting a decent pic of her on the ground...


I wasn't too sure if the back would sag since there's no ties, but it holds up great!  Loving the little baby shoulders!!!
I think my next bandana project will be something like this: http://ny-image1.etsy.com/il_fullxfull.223985305.jpg  Aren't those baby cowgirl boots adorable!?!

NEXT! Jess at Craftiness is not Optional had a sew-along this week for her adorable Junebug dress (tutorial here:  http://www.craftinessisnotoptional.com/2011/07/junebug-dress-sew-along-part-1-pattern.html  so of course I could not resist joining in.  Showed DH when it was done and he complemented my fabric choice, which I could not have been happier about since it was a ReUse centre find!!!  I think O will wear it to an upcoming wedding...


And theeen... there was this simple romper posted on Nap Time Crafters http://naptimecrafters.blogspot.com/2011/07/tie-sun-suit-tutorial.html (looove this blog) which looked so adorable on her little girl that I just couldn't resist:

So I'm thinking Olivia has plenty of clothes, but I CANNOT resist sewing for her!!!

Thursday, June 30, 2011

Lacy pink dress for Olivia and tie for my little man

So you know when dates kinda creep up on you until the event is a week away?  Well, my SIL's wedding is next week, and the dress I had 'planned' for Olivia to wear is still too small (yes, it's very weird having a teeny, tiny Dutch baby) so I had to come up with another solution.  I stopped in at the little one-horse-town sewing store here in hicksville (alright, it's not THAT bad...) and picked up some eyelet lace stuff 'cause I've been loving all these ruffly things around lately.  Since I couldn't find exactly what I wanted in the plethora of tutorials available, I whipped up my own 'pattern' for this beauty!


Since I wanted simple lines I didn't gather the lace, just sewed rows onto the top half of a rectangle (so the bottom isn't hemmed, just folded)


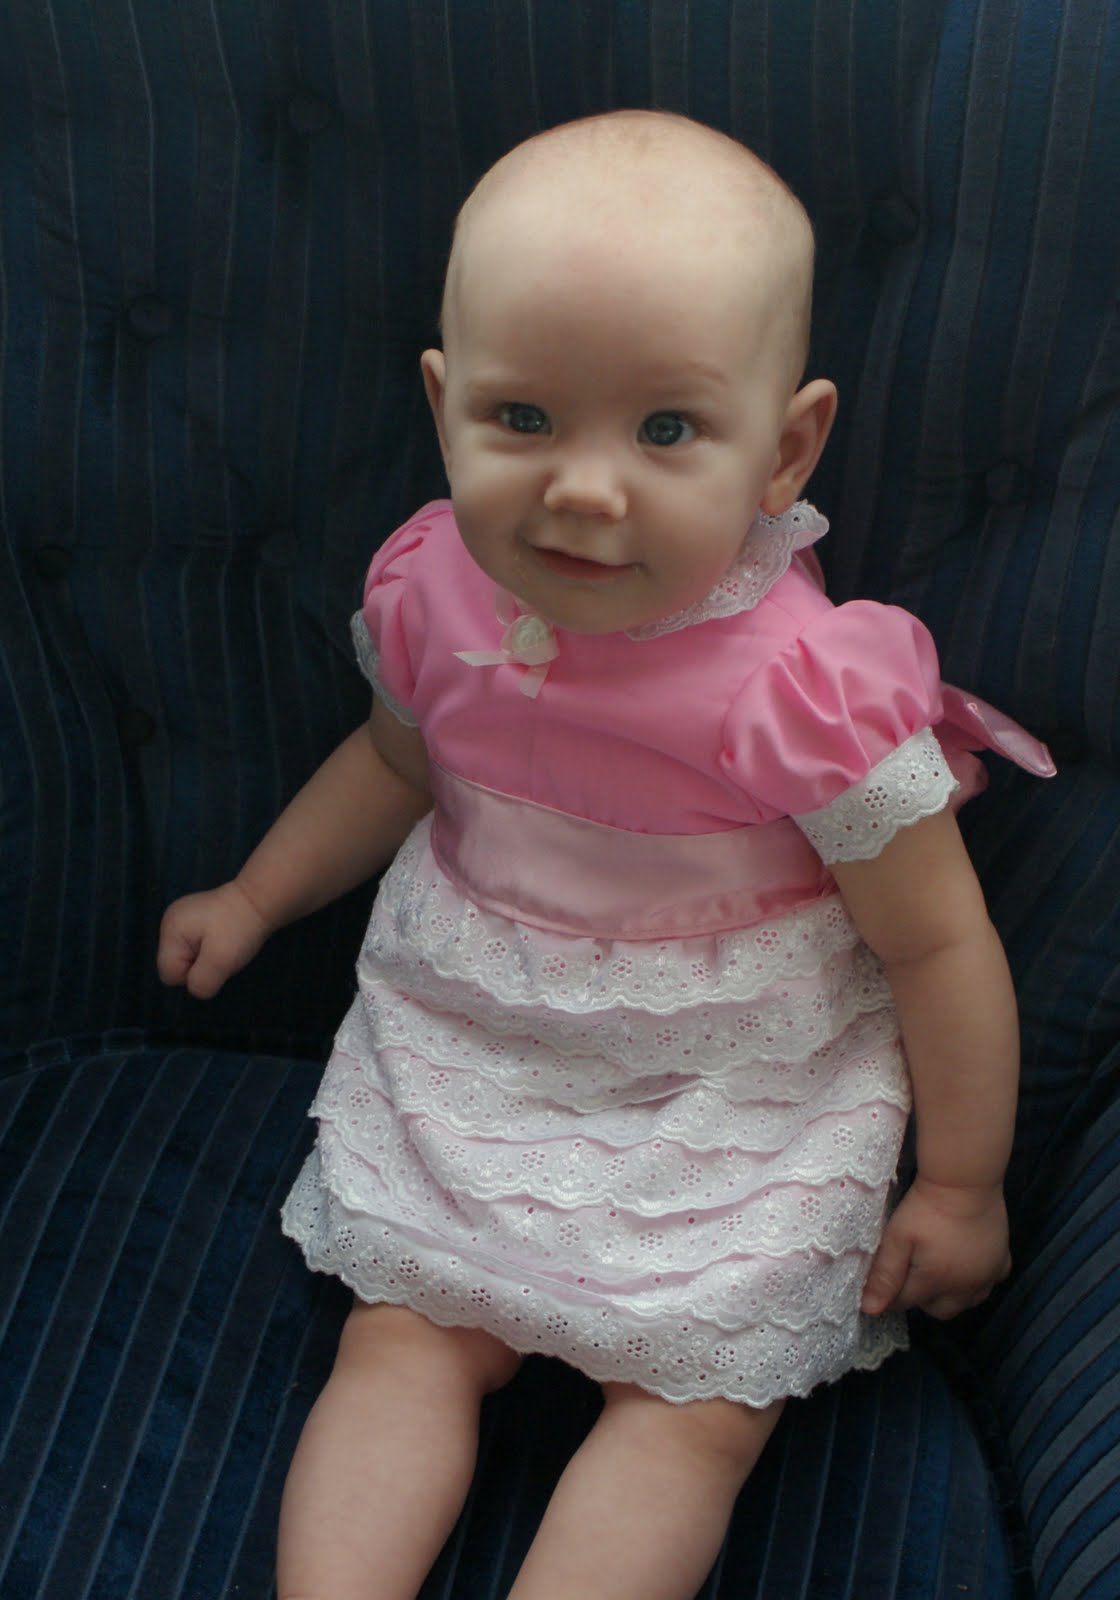
The pattern for the bodice is just 'traced' from one of Olivia's t-shirts.  There's a great tutorial for creating a pattern from a shirt on Craftiness is not Optional: http://theadventuresofroryandjess.blogspot.com/2011/02/charlotte-dress-part-1-making-your.html  Her little trick for puffed sleeves worked out great!  So I also added a little lace on the collar, and a little rose button (which I've been hoarding) and a bow on the front, snaps on the back for dressing ease, and pearl buttons over the snaps to dress it up.


  I think I'll have to pick up some flatter buttons though, since the little ball buttons might be a little uncomfortable in the car seat.  Here' some pics of my little model showing off her new dress (back lit and everything!)  Yes, my 5 month-old can stand when propped, and yes, I'm a little freaked out about her starting to run around!


I'm loving it!  Usually when I throw together something without a pattern I have to tweak quite a bit for it to turn out, but this one worked the first time!

When Ashton saw Olivia modeling her dress for Auntie's wedding he informed me that 'I want to be a handsome boy too!" So of course I had to whip something up for him!  Found a tutorial for a boy's tie at the Purl Bee: http://www.purlbee.com/little-boys-tie/  Although she suggests hand sewing the entire thing, I honestly don't have the patience, so I used my machine, then flipped the whole looong thing right side out.


I'm thinking it turned out fairly well considering it's not cut on the bias and sewn from broadcloth, although hubby informs me that it's a little too long for him (apparently a tie is supposed to hang untied around the neck with the ends hitting the waist.  It hits around his hips)

So both the kiddos will be all dressed up for the wedding, DH has a new snazzy shirt, and I bought something that looks slightly better than my usual attire (It reeeeeeally sucks shopping for a cute outfit when you have to keep nursing in mind - dresses are definitely out) I might end up trying to whip up a cute nursing top if I have time...
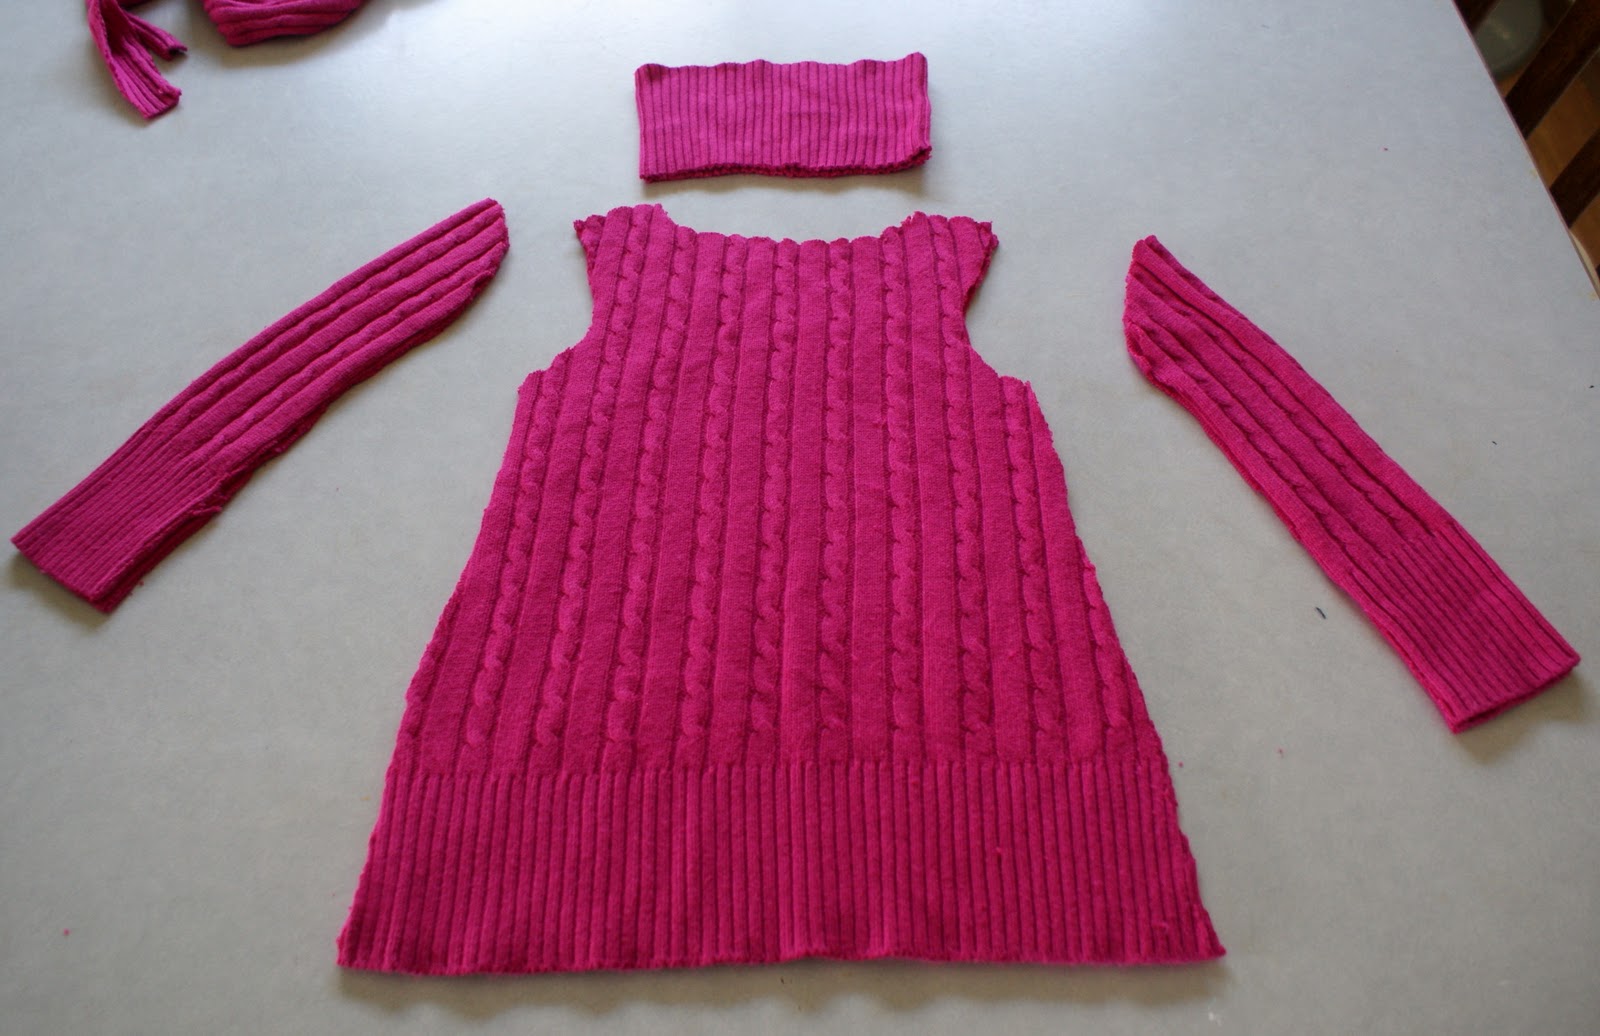
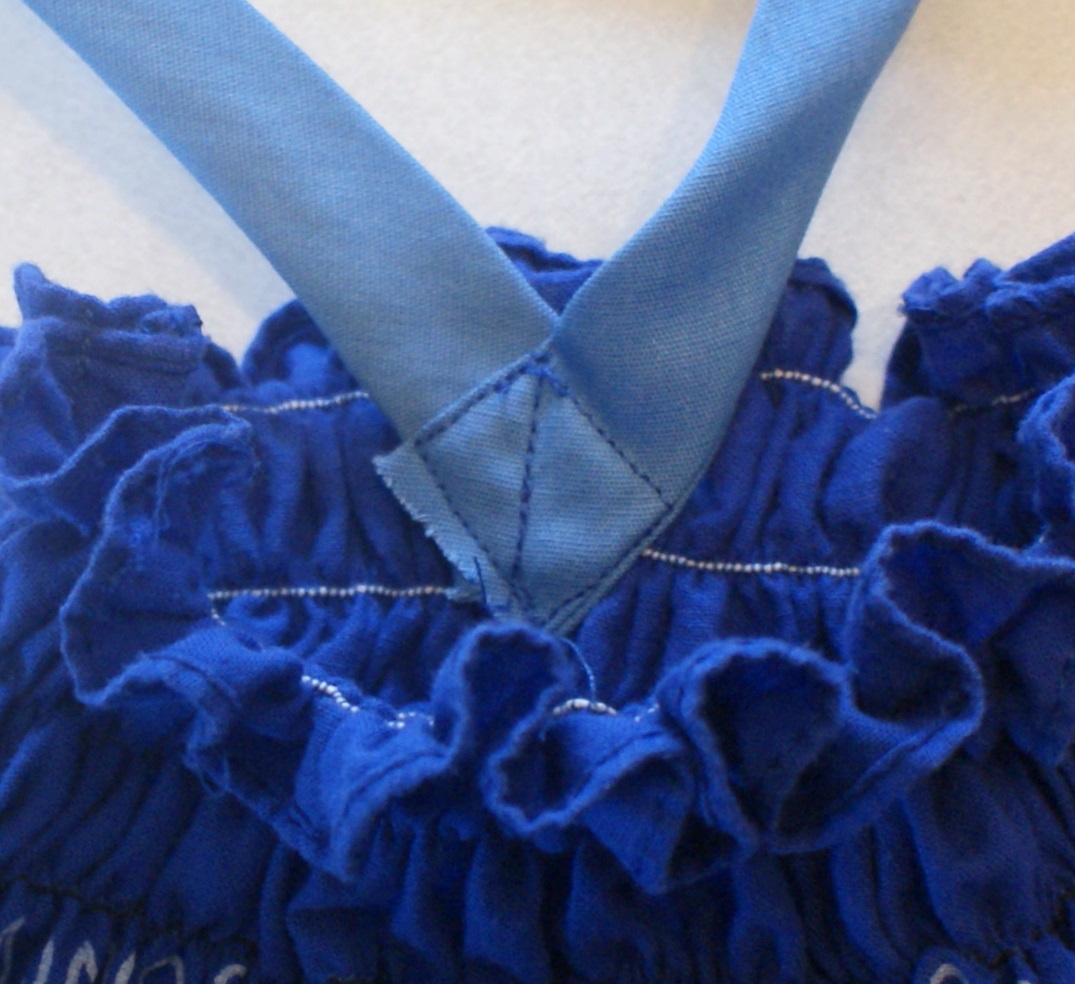
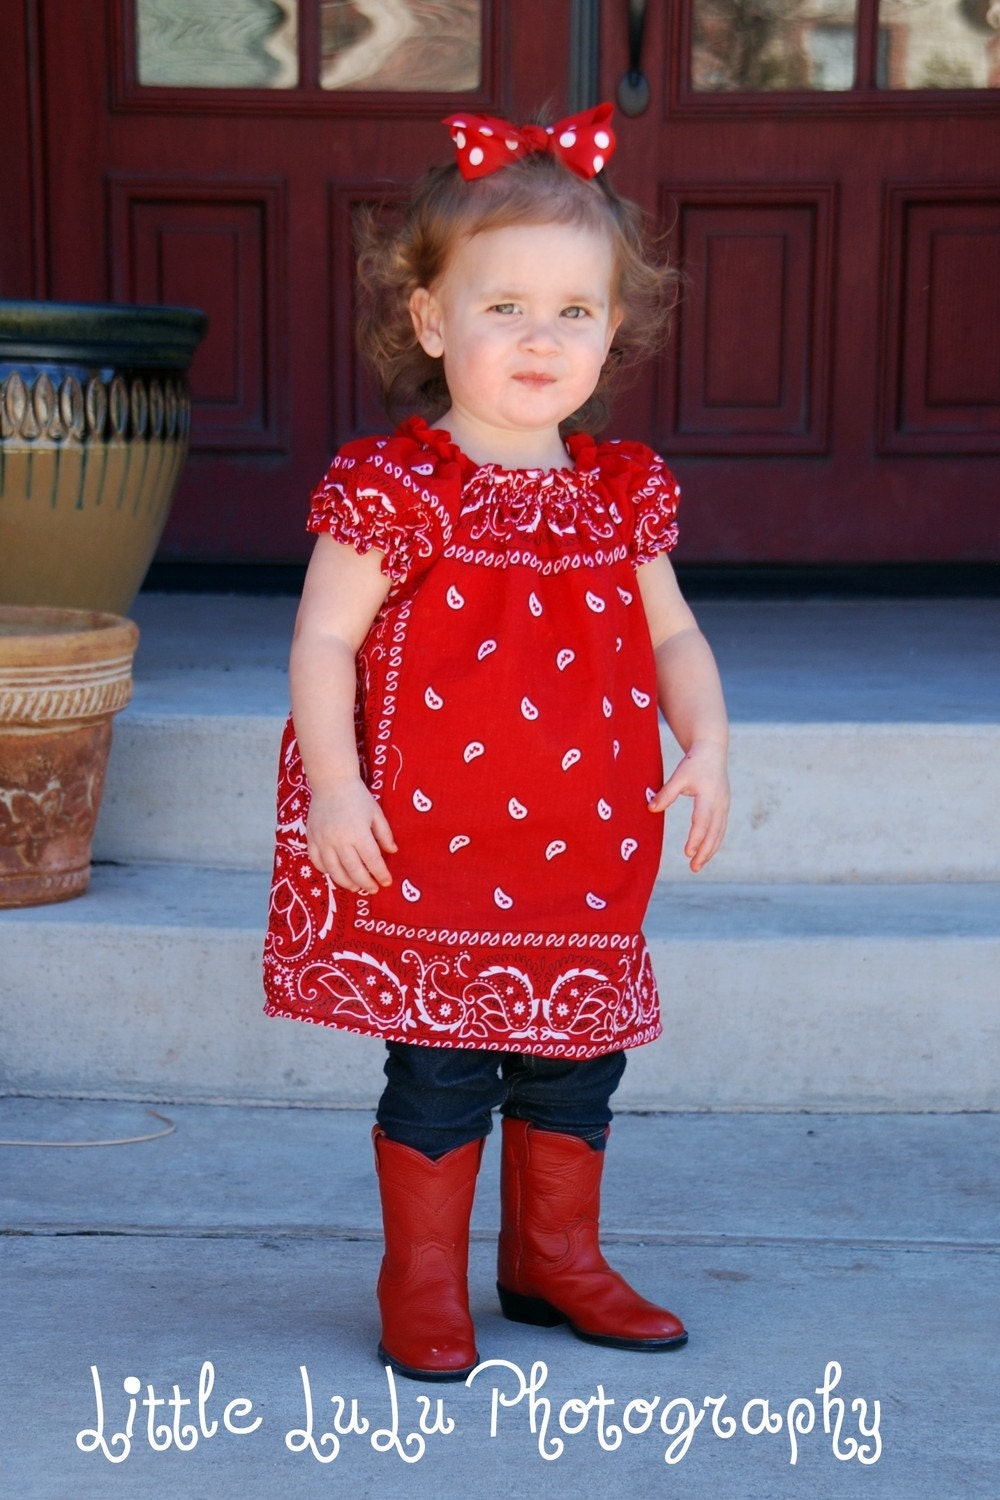
Sunday, May 08, 2011

itty bitty baby dress and bonnet

Made this 'itty bitty baby dress' (found here :http://www.made-by-rae.com/2008/04/free-itty-bitty-baby-dress-pattern.html) for Easter.  The pattern is for a preemie size, but I managed to scale it up for 3 months.  Unfortunately Olivia was unable to wear it ON Easter Sunday since we decided last minute to spend and extra day at my parents.  Ah well 
  Here's a pic of Olivia wearing it on Ashton's 4th bday (she had just found her hands and thought they were the neatest toys EVER.


  I also tried to draft a pattern for a sleek, non-ruffly bonnet.  It works okay, but if I ever make it again it needs a bit more work - darts and stuff.  A little longer in the back too, but since this is more of a Sunday bonnet instead of a summer one, I don't want it to cover the neck.  The best example of what I want to make is here:

  Isn't it GORGEOUS!  Luckily Little Betty is offering this sunsuit pattern for free!  http://littlebettydesigns.blogspot.com/2011/01/ruffle-sunsuit-free-pattern-and.html  So I'm thinking this might me one of my next projects.  I do have to do some investing to update my fabric stash though.  I'm thinking we'll hit the Reuse Centre after Ashton's opthomologist appt. this week.  (yay!)