Wednesday, August 31, 2011

Art for Grandma's house

So my mom and dad recently moved to a new house and are taking their time in decorating the place.  One thing Grandma REALLY wanted was grandkid artwork, so my sister and I got together and the kids painted some canvases.  Since the ages range from 2 months to 5 years we kept the pieces similar by using the same size of canvas and paint colours for each one.
The 3 older kids used a paintbrush and went at it.  I'm really excited about Ashton's (bottom right) since he has not really drawn or painted anything in his 4 odd years.  He's a typical type A, so everything has to be perfect or he'll get upset, but it looks like his hands have finally caught up to his imagination!  For the babies we just did some foot prints.  Olivia did hers in the jolly jumper, but I think she had more fun jumping in the bucket of water afterwards...

I had done some high key edits of my kiddos to put on my walls, which made my mom think that she wanted b&w photos of all the grandkids on her walls.  So while my sister was over we also did a little photoshoot for her 3.  A little photoshop later, and we have some great high key photos for grandma's walls!


Pretty pleased with the final product, although it would have been nice to get a good shot of all five kids together.  Unfortunately we tried at the end of the day, and got one, count it ONE shot where all the kids were looking at the camera.  And only one of them looked normal on that shot.  Guess we'll be giving that one a go another time...

Wednesday, August 24, 2011

Pinspiration

So here's a couple Pintrest project I've done over the past week.  Although my boards are chock full of nifty ideas, most of them will probably never get done, but I had to try my hand at these:

Taking my inspiration from this beauty Ashton and I made this piece for his room.  He thought the process was pretty cool


If I would do it again though, I'd buy a pack of brand new Crayolas instead of raiding the crayon bin and using no-name crayons.  The wax was a little runny, almost greasy, so I let the wax cool a few times and then shot it with the blow dryer again.

I also attempted something just for DH, although Ashton kinda ate them all.  When I saw this link for microwave potato chips I just HAD to try them.  They turned out much better than expected, even though I forgot to PAM the plate the first time...this is the amount you get from one potato:


The only thing I'd do different next time (and I will be doing this again!) would be to pick up some sea salt to season with.  Regular table salt just didn't seem to cut it.

I also made some homemade laundry detergent and fabric softener, both of which I'm rather impressed with.  I added some essential oils (lavender) so I wouldn't miss the store bought scents too much, and the only difference I've noticed is that the clothes are less static-y then they were!  Will definitely be keeping this one up!


Tuesday, August 16, 2011

Easy shirred bandana dress tutorial

A few posts ago I posted a bandana dress that I had made for Olivia here.  It turned out really cute and since it's so easy to make I thought I'd put together a tutorial for it.  This one will actually be a toddler top, but the only difference in the construction is how tight the shirring is.  Here we go!
First of all hit the dollar store and pick up two bandanas.  These were $1 each and are 100% cotton, so I prewashed them so they won't shrink afterwards.  I prewashed the previous ones as well, but on subsequent washings the colour bled a bit, so be warned!
Next, we're going to shir each bandana.  There's lot's of shirring tutorials out there, but here's what I do. 
Wind the bottom bobbin with elastic thread.  Don't stretch the thread tight as you wind it, but don't wind it loosely either.  Then place it in your bobbin holder.  I've used both a side and drop-in machine and they both seem to work fine.
Sew a few rows along the edge of the bandanas.  It can be kind of tricky to get the rows perfectly straight, so go ahead and mark it (I'm too cheap to buy a water soluable marking pen, so I just grab a piece of chalk off Ashton's easel!)  Less rows will make more of an empire waist line.  I decided on 5 for this one.  Don't worry about how gathered your lines are at this point. (left picture)
To gather your sirring simply pull the bottom bobin thread (the elastic) to your desired width.  Repeat with all the rows, making sure both front and back are roughly the same width (right picture)

So that the elastic ends don't slip after trimming and so that they don't stick out and tickle, I sew the front and back together using a french seam.  With a french seam you sew the sides firstly with the WRONG sides together, then turn and sew again with the RIGHT sides together.  Obviously your second seam will be a little wider so you don't see the ends of your first seam poking out.


To make the halter tie sew two ribbons together at a right angle (left picture)  Or if you don't have any ribbon that matches your dress, grab some scrap fabric (or bias tape, or whatever works) and sew a small tube to flip right side out.  Then sew the right angle of your ribbon to the front of your dress.

And VOILA you're done!  Pretty easy, hey?


Feel free to ask me any questions you may have and I'll do my best to answer them!  Have fun!


Featured on Tip Junkie

Thursday, August 11, 2011

How to resize a tshirt (and my first go at freezer paper stencilling!)

K, so altering a tshirt may not be rocket science, but you never know.  I've had this idea for freezer paper stencilling for awhile, but since I don't have the shopping opportunities I used to it's kinda been on hold until I could pick up two red tshirts.  Plain red.  With nothing on them.  Like, no logos or anything.  Yup.  Harder than you thought isn't it?  Okay, it wasn't all that hard.  Zellers had them.  And on sale too!  At least they had Ashton's size (I got him a 6)  But try to find a plain red t or onesie in a 6m size, especially in August!  But I found a long-sleeved t which could be re sized for O (on sale too!) in a size 2.

So obviously the first thing to do is cut up the shirt.  Trace a tshirt that fits along the arm and side seam, remembering to add seam allowance (!)  If the neck of the new shirt isn't too much bigger, leave as is. (in my case it was fine.  If you do have to alter it...um...google it?) Cut along lines.  Trace the sleeves of the old shirt along the arm seam onto the sleeves of the new shirt.  In this case the hem of the sleeves were about the same size, so I definitely took advantage of that.

So you should end up with something like this:


I used a serger for this project (hence the white thread.  Too lazy to change it) but you could easily use a regular machine and zig zag the edges afterwards.  Open up your shirt, and sew the arm seams, but not the seam under the arm for now.  You might have to tweak the curve of the arm a bit, but this is knit, and knit is forgiving.  A little stretch, a little push, and a final steam with the iron and no one is the wiser, right?  Okay, yes.  I admit it.  I cheat a lot with sewing, but is anyone actually going to stop your kids and examine their clothes reeeally closely?  I should hope not.  Moving on.  Where were we?  I think here:
Now sew the underarm seam continuing to the side seam.  Ta Da.  For those of you still trying to 'set' your sleeves after sewing the side seams, STOP.  I serged the bottom of the shirt as well so I wouldn't have to roll the hem 'cause I'm lazy like that.

A quick switch to the regular machine for the hem (yes, I switched the thread) and DONE.

Okay, not quite done.  I still had to press it. (when ironing knits don't drag the iron across, just hold in place and steam. Not for too long obviously.  When you start seeing smoke, that's a sign you've pressed a little too long...) But I had good reason not to press this right away, since I was using this shirt for my first (bum ba da bum!)
FREEZER PAPER STENCIL
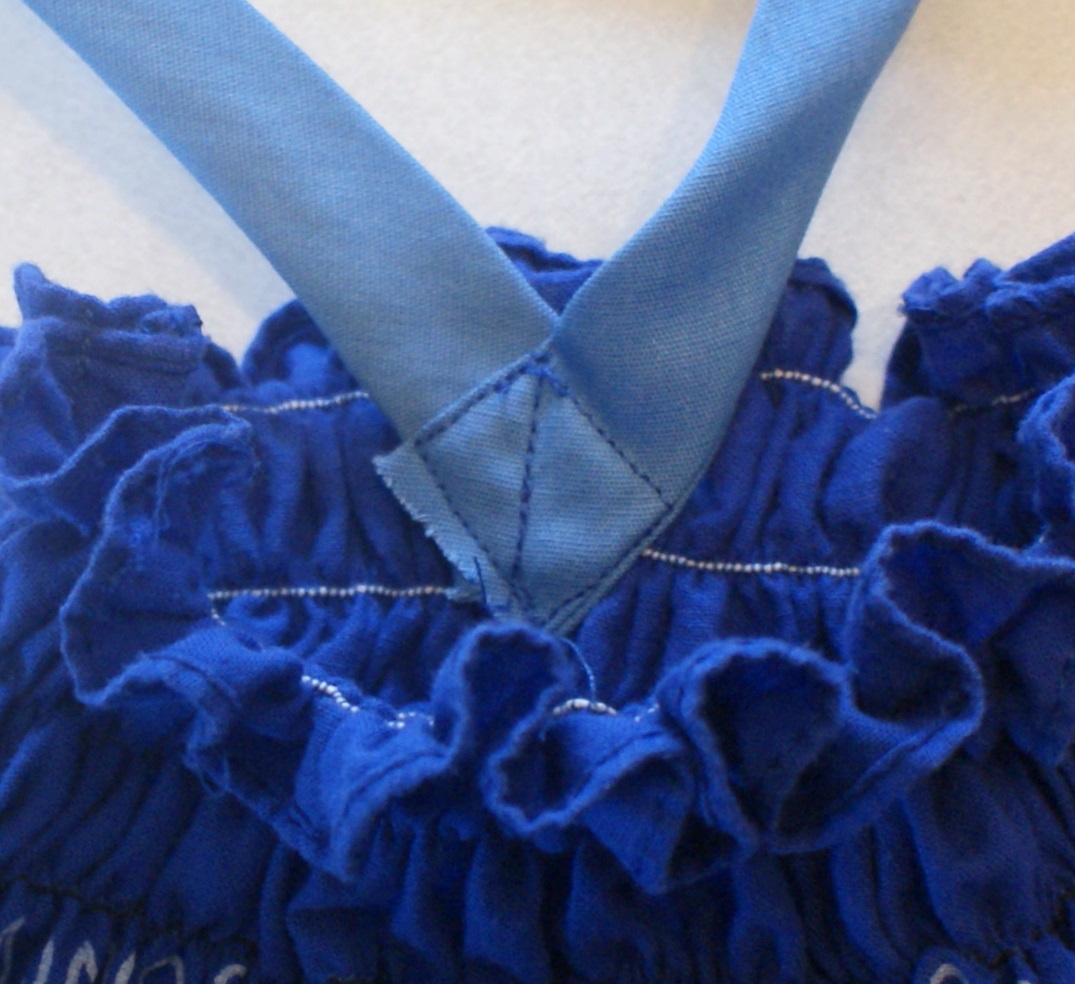
Yay! Lots of tutorials for that floating around blog land for these, so I won't give you a step by step for that, but I will show you the finished product.  Ahem, drum roll:

(see how pretty the hem is now?) I'm so proud of myself for pulling this off with the first try!  And Ashton looves them! (Olivia just wanted to eat it, go figure)  They weren't really in a posing mood, but I did get this shot of them:


Anyways, hope this was marginally helpful to somebody...

my crafty side is already filling up with more freezer paper stencil ideas...it's so easy and fun!

Tuesday, August 09, 2011

Technical difficulties

Yes I made a button just for you.  No  I can't see it either.  Yes I'm working on it.  And it's frustrating.

Update: Yay.  Figured it out.  Turns out I just can't read instructions very well...who knew?!?! Enjoy your button - I know you want to post it riiiight?

Friday, August 05, 2011

DIY decor using shims.

So my basement is slooooowly getting done.  DH is having problems convincing buddies to come and help install the floor - it's 2/3 of the way there.  As soon as that's done, we can start setting up since there's just trim and doors and bathroom stuff and closet stuff...okay there's a lot of stuff left after the floor, but you get the point.  I've seen some pretty cool stuff here in 'net land to decorate the basement with.  My Pintrest basement board is chock full of all sorts of DIY goodies.  Here's one I absolutely swooned over!

Perfect by a little reading corner!  So my little brain got to work: How can I make this without 1. going to buy lumber and transporting it home on top of the car seats and 2. Cut the lumber without wading over top of DH's mess in the garage.  The answer came as I was organizing the complete disaster downstairs: SHIMS!  (y'know, those little wedges used to make the jam level when installing a door - I think they're usually made of ceder)  There were two lovely packs sitting there waiting and waiting to be used, so I thought, why make them wait any longer?  So I went and grabbed the prettiest ones (some are a little cracked or knotty)  As stated before, although I can use power tools, I didn't feel like wading through the mess, so to create the points for the arrows I used a utility knife.  Just made a few cuts and voila beautifully pointy shims!  To 'antiquify' the wood I let some steel wool sit in white vinegar for a few hours, then brushed the mixture on the wood.  (wherever the bits of steel wool hit the wood, there ended up being little rusty speckles.  And I also antiqued my ugly laminate counter top in the process - reason #52 for a new kitchen...)


I had envisioned doing each sign in some lovely font which went with the story, but that never occurred.  Just painted some block letters on with black acrylic and outlined with white.


I chose locations in stories which I had read as a child (okay, who am I kidding, that I still read now) Mounted on a scrap piece of wood (also 'antiqued') with wood glue, I think it looks pretty good!

I also saw this sign from artsy fartsy mama that I thought would 'match' pretty well

So here's my version:

Shims lined up, one glued across the back holding it all together.  I decided not to 'antique' this one.  And how did I get the font?  Well I'm glad you asked!  After brainstorming quite a bit I thought of this really easy way to transfer images to a non-smooth surface.  All I did was print the text (backwards!) on a transparency.  With an ink jet printer the ink does not dry (make sure you're not using an 'inkjet transparency')  Flip the transparency ink side down, place on wood (no wiggling, you'll smudge it) and rub.  The ink should transfer so that you can go  over it with the paint colour of your choice!  Done and done.

My hubby's comment when he saw my 'creations' "How do you expect me to hang the doors if you keep using all the shims?"  Ha ha.


UPDATE: YES, I MISSPELLED ROALD DAHL'S NAME. IT'S FIXED NOW...OOPS!

Wednesday, August 03, 2011

Pattern drafting

So awhile ago I thought I'd try my hand at drafting a pattern or two.  Not like I don't normally, it's just that usually I'm just tracing existing clothes to make something else.  With this dress I actually wanted to make something brand new! Sooooo here it is:


Please pardon the lack of pressing; I have this strong antipathy to ironing.  It's around a 12 month size, which means that it'll probably end up being a gift since it's a bit light for Olivia to wear even with long sleeves underneath.  I'm loving the ties at the side! And the ruffles at the bottom turned out great!  Here's a few detail shots


So although this isn't my first post about a pattern I've drafted, it is my first attempt - turned out pretty well if I do say so myself!

Tuesday, August 02, 2011

6 month photoshoot

So baby girl was 6 months in July so of course a photo shoot was in order. It took a few tries (grumpy, too hyper, gloomy, bad-lighting day, forget to change white balance on camera...) but finally got a nice collection. Olivia is most definitely full of spunk, as these pictures show (tutu - Old Navy, headband - sewn with synthetic scraps cut in circles and melted on the edges, sewn with pearl beads in centre)  Yes, her eye is turning in.  Ashton was in glasses at 17 months, and unfortunately I think Olivia will most likely get them even earlier since we don't have to wait for a referral to a pediatric opthomologist.  So enjoy this uncluttered baby face while it lasts!


And Ashton could not be left out of the loop, so he got to get a few pics snapped too.  What a handsome young man my roly poly baby is turning out to be!